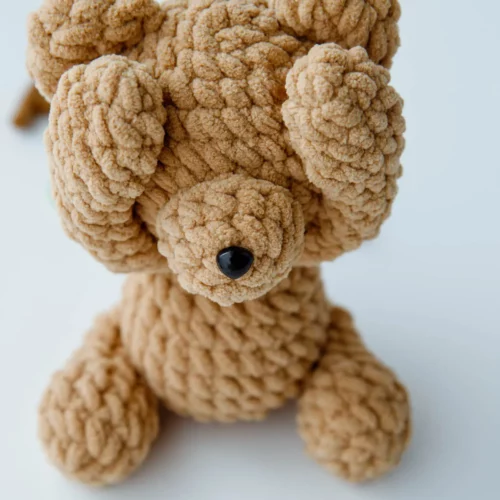
Crochet Bear – Amigurumi Free Pattern
Learn how to crochet bear with this beginner-friendly tutorial.
Print
Pin
Equipment
- crochet hook 6.0mm
- Darning needle
- scissors
- stitch marker
Ingredients
- Plush yarn light brown
- Fiberfill
- hot melt adhesive
- Safety nose-1 pc
Instructions
Step by Step Crochet Bear Patterns
Head of crochet bear:
- R1: start with 6 sc in magic ring. 1 ss, 1 ch [6]
- R2: ( 2 sc in next st ) * 6 times. 1 ss, 1 ch [12 ]
- R3: ( 1 sc, 2 sc in next st ) * 6 times. 1 ss, 1 ch [18]
- R4: ( 2 sc, 2 sc in next st ) * 6 times. 1 ss, 1 ch [24]
- R5: ( 3 sc, 2 sc in next st ) * 6 times. 1 ss, 1 ch [30]
- R6-9: 30 sc. 1 ss, 1 ch [30]
- R10: ( 3 sc, sc2tog ) * 6 times. 1 ss, 1 ch [24]
- R11: ( 1 sc, sc2tog, 1 sc ) * 6 times. 1 ss, 1 ch [18]
- R12: ( 1 sc, sc2tog ) * 6 times. cut the tail and weave the ends [12]
Body of crochet bear:
- R1: start with 6 sc in magic ring. 1 ss, 1 ch [6]
- R2: ( 2 sc in next st ) * 6 times. 1 ss, 1 ch [12]
- R3: ( 1 sc, 2 sc in next st ) * 6 times. 1 ss, 1 ch [18]
- R4: ( 2 sc, 2 sc in next st ) * 6 times. 1 ss, 1 ch [24]
- R5-7: 24 sc. 1 ss, 1 ch [24]
- R8: ( 1 sc, sc2tog, 1 sc ) * 6 times. 1 ss, 1 ch [18]
- R9: 18 sc. 1 ss, 1 ch 18]
- R10: ( 1 sc, sc2tog ) * 6 times. 1 ss, 1 ch [12]
- R11: 12 sc. [12] (leave a longer yarn to sew it on the head)
Make 2 ears and 1 nose of crochet bear:
- R1: start with 6 sc in magic ring. 1 ss, 1 ch[6]
- R2: ( 2 sc in next st ) * 6 times. 1 ss, 1 ch [12]
- R3: 12 sc. cut and leave a tail [12]
Crochet bear’s tail:
- R1: start with 6 sc in magic ring. 1 ss, 1 ch [6]
- R2: ( 1 sc, 2 sc in next st) * 3 times. 1 ss, 1 ch [9]
- R3: 9 sc. cut the tail and weave the ends [9]
Feet of crochet bear:
- R1: start with 6 sc in magic ring. 1 ss, 1 ch [6]
- R2: ( 2 sc in next st ) * 6 times. 1 ss, 1 ch [12]
- R3-4: 12 sc. 1 ss, 1 ch [12]
- R5: ( 1 sc, sc2tog) * 4 times. 1 ss, 1 ch [8]
- R6-8: 8 sc. cut and leave a tail [8]
Make front feet of crochet bear
- R1: start with 6 sc in magic ring. 1 ss, 1 ch [6]
- R2: ( 1 sc, 2 sc in next st ) * 3 times. 1 ss, 1 ch [9]
- R3-R4: 9 sc. 1 ss, 1 ch 9]
- R5: ( 1 sc, sc2tog ) * 3 times. 1 ss, 1 ch [6]
- R6-11: 6 sc. cut and leave a tail [6]
Assemble crochet bear
- Before we continue on assembling the shy bear process, make sure that you already have these parts and materials:
- head
- body
- 2 ears
- 1 nose
- tail
- 2 feet
- The front 2 feet
- Safety nose
- hot melt adhesive
- fabric glue(optional)
Let’s assemble crochet bear’s parts together!
- Step 1. Fill it with fiberfill and continue sewing until you close it and finally connect the head to the body.
- Step 2. Attach the nose on the middle part of the head.
- Step 3. For the ears, flatten your work and sew the lower part of it. Repeat the process for the other ear.
- Step 4. Stitch the left ear in between the rows of 3-7 on the left side of the head. Secure it with hot melt adhesive. Repeat the process for the right ear.
- Step 5. At the back part of the body, attach the tail using hot melt adhesive.
- Step 6. Get the two legs, fill it with fiber fill, and close the last open rows to secure it.
- Step 7. Sew the legs between R6- R10. After it, secure them on the body using hot melt glue.
- Step 8. Grab the other 2 front feet and sew it to the neck part. Make sure to sew it well so it will not be detached to the body
- Step 9. Put hot melt glue on the foot of it. Let it cool while pressing it down. Follow it with applying glue to the foot to cover its face. Press it down again to make sure that it will be attached to the face. Repeat the process on the other foot.
- Step 10. Paste the nose to the face of the bear. Don’t forget to check every pieces if they are attached well.
Notes
- Our pattern is written in US crochet terms.
- Follow the pattern carefully to avoid mistakes.
- Use a stitch marker for every first stitch of the round.
- Take note of the specific stitch counts and techniques.
- Our pattern requires some attention to detail.
- Additional notes are written in Italics.