
Ready to crochet a sweet and juicy strawberry! This crocheted fruit project is brimming with beauty and originality. Think of using a variety of lovely strawberry-shaped crochet ornaments to decorate your home or to add a unique touch to your bag or cap. They can even create a charming car hanging that will make everyone smile everywhere you go. Come along on this crocheting adventure with us, and let your creativity soar. Start working on the pattern right away to begin crocheting your lovely strawberries!
In addition, strawberry branch can be used to match crochet flower bouquet. So we offer you many free patterns for other crochet flowers. Patterns List Link.

Why Do We Love Strawberry
- We love this pattern because it creates a charming and realistic strawberry with intricate details. The structure includes petals, sepals, stamens, and leaves, adding depth and authenticity to the design.
- For the best color suggestion, vibrant red for the fruit, green for the sepals, and natural shades for the leaves are recommended. Additionally, there are possibilities for color variations, allowing for personalization and creativity in the project.


Usage
- Original Usages: Crocheted strawberries can be used as pleasant gifts or charming decorations. They are versatile and can be incorporated into various craft projects and displays.
- Functional Usages: Crocheted strawberries can be attached to other crochet items such as blankets, hats, or bags, adding a cute and whimsical touch. They can also be used as appliques for clothing or accessories, enhancing their visual appeal.
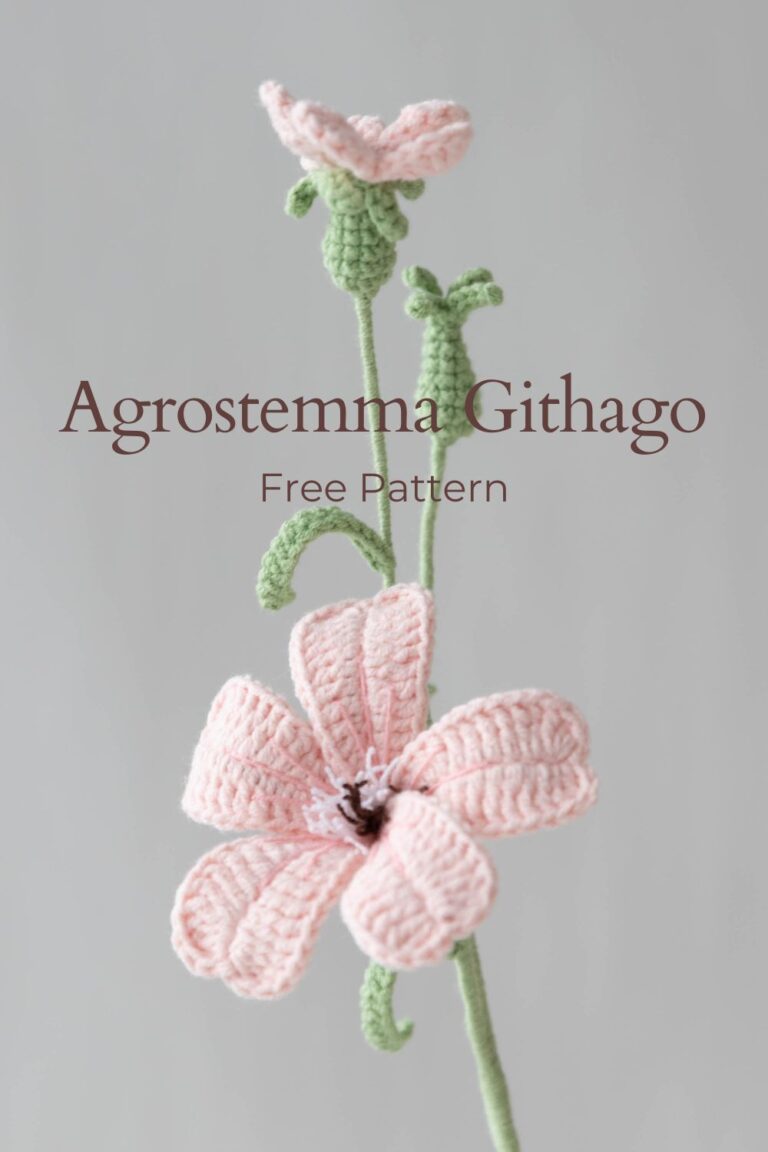
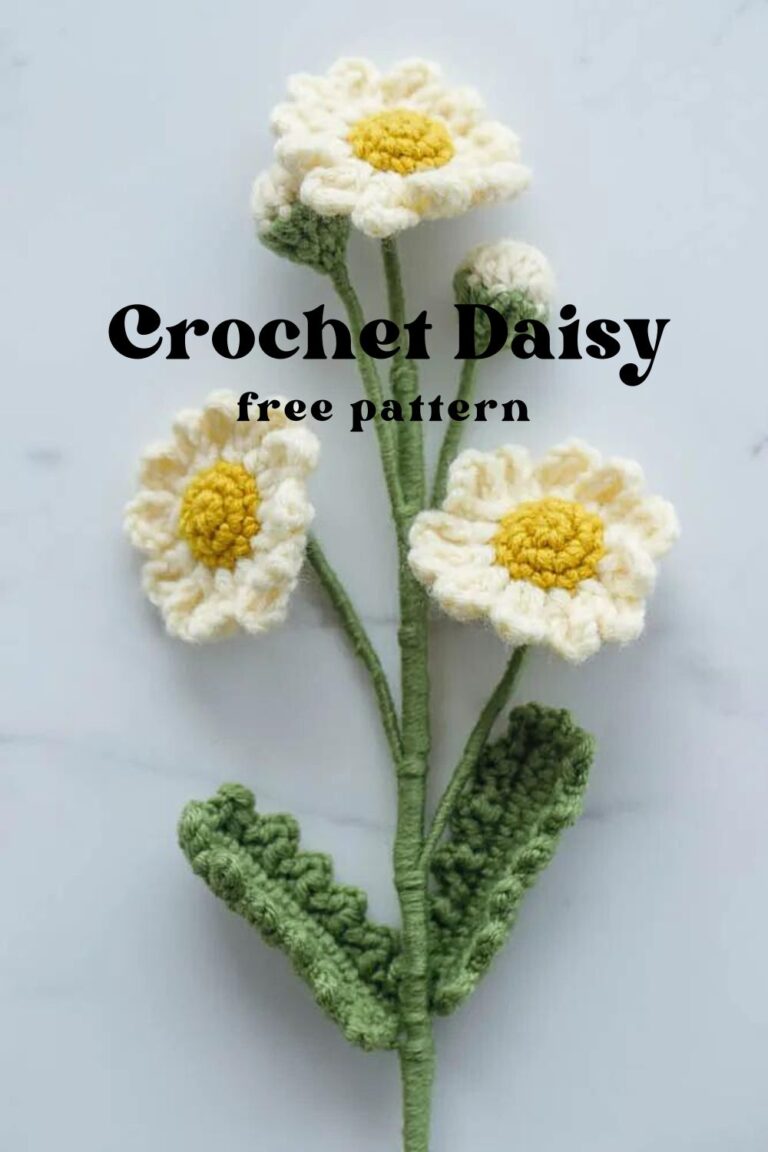
- Flower Bouquet Ideas: Crocheted strawberries can be an excellent addition to flower bouquets, either as the main flower or as accent flowers or foliage/greenery. They can bring a unique and playful element to the bouquet, adding texture and color. Pairing crocheted strawberries with other crochet flowers like daisies or roses can create a charming, handmade bouquet. Alternatively, combining them with real or artificial fruits and flowers can create a refreshing and vibrant arrangement.
Video
Note: Video subtitles need to be turned on by yourself in the settings
Materials
- Yarn -yarn of four colors, pink, white, yellow, and green
- Hook – 2.5mm
- Flower rod – 16 inches long x 0.08 inches diameter (40cm x 2mm)
- Iron wire – 0.02 inches diameter ( 0.4mm)
- Stitch Marker
- Darning needle
- Scissors
- Hot Melt Adhesive
- Fiberfill
Difficulty
The pattern for crocheting the strawberry is beginner-friendly and consists of basic stitches such as single crochet and double crochet. However, there is a slightly more challenging part in Round 9, where you need to do sc2tog (single crochet two stitches together) and sc3tog (single crochet three stitches together). This decreased technique requires precision, but beginners can master it with practice. Embrace the challenge, as a guided video is available to help you grow your crochet skills.
Stitches and Abbreviations Used
- Sc – Single crochet
- Sc2tog – Single crochet 2 stitches together (invisible decrease)
- Sc3tog – Single crochet 3 stitches together (invisible decrease)
- Dc – Double crochet
- Picot st – Picot stitch (a decorative looped stitch)
- Ss – Slip stitch
- Hdc – Half double crochet
- Tr – Triple crochet
- Dtr – Double treble crochet
Special Stitches
- Picot Stitch: Picot stitch creates decorative points or loops by chaining a small number of stitches and slips stitching. This forms a little loop or point that gives the design texture and visual interest.
- Decrease (sc2tog): The decrease stitch is used to decrease the stitch count and shape the piece. To work a single crochet decrease (sc2tog), insert the hook into the first stitch, yarn over, pull up a loop, insert the hook into the next stitch, yarn over, pull up a loop, yarn over again, and pull through all three loops on the hook.
- Decrease (sc3tog): The “sc3tog” stitch is used in the strawberry pattern to decrease three single crochet stitches into one stitch. It helps create shaping and curves in the strawberry’s body, giving it a rounded appearance. Reducing the stitch count helps achieve a smaller circumference for the strawberry’s top part.
- Half Double Crochet (hdc): The half double crochet stitch is used in the strawberry flower stamen to create a taller stitch with more height than a single crochet but less than a double crochet.
- Double Treble Crochet (dtr): The “dtr” stitch is used in the strawberry pattern to create taller stitches and elongated stitches that stand out and provide a unique visual element. To work the double treble (dtr) stitch in crocheting the strawberry pattern, you start by yarn over the hook twice. Then, insert the hook into the designated stitch. Yarn over and pull up a loop, creating five loops on the hook. Next, yarn over again and pull through two loops, repeating this step four more times until only one loop remains on the hook
Pattern Notes
- This pattern is written in US crochet terms.
How to make the Strawberry Fruit (make 3)

- R1: Create a magic ring and crochet 6 sc stitches into the center of the ring. 1 ss, 1 ch, Place a stitch marker to mark the beginning and end of the row.
- R2: (1 sc, 2 sc in next st) * 3 times. 1 ss, 1 ch
- R3: (1 sc, 2 sc in next st, 1 sc) * 3 times. 1 ss, 1 ch
- R4: (3 sc, 2 sc in next st) * 3 times. 1 ss, 1 ch
- R5: (1 sc, 2 sc in next st, 1 sc) * 5 times. 1 ss, 1 ch
- R6: (3 sc, 2 sc in next st) * 5 times. 1 ss, 1 ch
- R7-R8: work sc in each of the 25 stitches. 1 ss, 1 ch
- R9: (sc2tog) * 11 times, then sc3tog. 1 ss, 1 ch
- R10: Fill the strawberry with fiberfill for stuffing. Repeat (sc2tog) 6 times. cut and leave a tail.
- Cut a few cm of wire, fold it twice, and then secure it in the center with yarn to prevent the wire from easily slipping out of the strawberry.
Strawberry Sepals (make 3):
- R1: Crochet 10 sc stitches in the round. 1 ss
- R2: Ch 1, in the next stitch crochet (dc, 1 ch picot st, dc, 1 ch), ss in the next stitch. Repeat this sequence a total of 5 times. Cut and leave a tail.
Assemble Strawberry Fruit and Sepals:
- Step 1: Once R10 is completed, cut a small length of wire and fold it twice.
- Step 2: Tie the wire with yarn in the center of each strawberry to prevent it from slipping out.
- Step 3: Crochet three sepals according to the pattern, leaving a tail on each one.
- Step 4: Attach the sepals to the top of the strawberries using hot melt adhesive.
- Step 5: Secure the wire within the sepals and strawberries by wrapping yarn around them.
- Step 6: Use hot melt adhesive to secure all the components in place, creating beautifully presented strawberries.
Strawberry Flower Stamens (make 2):

- Work in the round, ch 2, leave the four half double crochet stitches unfinished, and pull through all the loops, ch 2, then 1 ss, 1 ch, cut and close the loop tightly
Strawberry Flower Petals (make 2):
- R1: Crochet 5 sc stitches in the round. 1 ss
- R2: (2 ch, dc, 2 ch, 1 ss) * 5 times. cut and leave a tail, weave the tail with darn needle
Assemble Strawberry Stamens and Petals:
- Step 1: Take a wire and create a loop.
- Step 2: Position the loop at the center of the flower.
- Step 3: Place the stamen on top of the loop.
- Step 4: Use hot melt adhesive to secure the stamen in place.
- Step 5: Carefully pull the wire from within the flower to firmly attach the stamen at the center.
- Step 6: Cover the wire with yarn.
- Step 7: Use hot melt adhesive to secure the wire in place.
Big Leaf (make 3):

- R1: Crochet 6 sc stitches in the round, 1 ss
- R2: Ch 2, add wire,
- In the first stitch, crochet (dc, 1 ch picot st).
- In the second stitch, crochet (tr, 1 ch picot st) 3 times.
- In the third stitch, crochet (dtr, 1 ch picot st) 2 times.
- In the fourth stitch, crochet (dtr, 1 ch picot st) 2 times.
- In the fifth stitch, crochet (tr, 1 ch picot st) 3 times.
- In the sixth stitch, crochet (dc, 2 ch), ss, and cut the yarn, leaving a tail.
Note: Carefully attach the flower rod while you are stitching to make a big leaf, the flower rod will make the big leaf firm.
Small Leaf (make 3):
- R1: Crochet 6 sc stitches in the round.
- R2: Chain 2, add wire
- In the first stitch, crochet (dc, 1 ch picot st).
- In the second stitch, crochet (tr, 1 ch picot st) 3 times.
- In the third stitch, crochet (tr, 1 ch picot st) 2 times.
- In the fourth stitch, crochet (tr, 1 ch picot st) 2 times.
- In the fifth stitch, crochet (tr, 1 ch picot st) 3 times.
- In the sixth stitch, crochet (dc, 2 ch), ss, and cut the yarn, leaving a tail.
Note: Carefully attach the flower rod while you are stitching to make a small leaf, the flower rod will make the small leaf firm.
Assemble The Big and Small Leaves:
- Step 1: Crochet three big leaves and attach the flower rod while stitching for sturdiness.
- Step 2: Leave a tail, cover the rod with yarn, and secure it using hot melt adhesive.
- Step 3: Attach the three big leaves to the strawberry.
Similarly:
- Step 1: Crochet three small leaves using the provided pattern.
- Step 2: Attach the flower rod to make them firm while stitching.
- Step 3: Leave a tail, cover the rod with yarn, and secure it with hot melt adhesive.
- Step 4: Attach the three small leaves to the strawberry.
Final Assemble:

- Step 1: Wrap the three small leaves together with yarn, and secure it with hot melt adhesive
- Step 2: Wrap a big leaf around the top of the stem with yarn, Wrap around to about 5cm and add the other two big leaves
- Step 3: Continue wrapping, adding strawberry flowers and strawberry fruit in turn. Three strawberries all facing one side
- Step 4: Finally, add the three small leaves, wrap to the end, cut the tail and secure it with hot melt adhesive. Adjust the branches to give them a more refined look

Crochet Strawberry
Equipment
- hook 2.5mm
- stitch marker
- Darning needle
- scissors
Ingredients
- Yarn yarn of four colors, pink, white, yellow, and green
- Flower rod 16 inches long x 0.08 inches diameter (40cm x2mm)
- Iron wire 0.02inches diameter ( 0.4mm)
- Hot Melt Adhesive
- Fiberfill
Instructions
Strawberry Fruit (make 3):
- R1: Create a magic ring and crochet 6 sc stitches into the center of the ring. 1 ss, 1 ch, Place a stitch marker to mark the beginning and end of the row. R2: (1 sc, 2 sc in next st) * 3 times. 1 ss, 1 chR3: (1 sc, 2 sc in next st, 1 sc) * 3 times. 1 ss, 1 chR4: (3 sc, 2 sc in next st) * 3 times. 1 ss, 1 chR5: (1 sc, 2 sc in next st, 1 sc) * 5 times. 1 ss, 1 chR6: (3 sc, 2 sc in next st) * 5 times. 1 ss, 1 ch R7-R8: work sc in each of the 25 stitches. 1 ss, 1 chR9: (sc2tog) * 11 times, then sc3tog. 1 ss, 1 chR10: Fill the strawberry with fiberfill for stuffing. Repeat (sc2tog) 6 times. cut and leave a tail. Cut a few cm of wire, fold it twice, and then secure it in the center with yarn to prevent the wire from easily slipping out of the strawberry.
Strawberry Sepals (make 3):
- R1: Crochet 10 sc stitches in the round. 1 ssR2: Ch 1, in the next stitch crochet (dc, 1 ch picot st, dc, 1 ch), ss in the next stitch. Repeat this sequence a total of 5 times. Cut and leave a tail.
Assemble the strawberry fruit and sepals:
- Step 1: Once R10 is completed, cut a small length of wire and fold it twice.Step 2: Tie the wire with yarn in the center of each strawberry to prevent it from slipping out.Step 3: Crochet three sepals according to the pattern, leaving a tail on each one.Step 4: Attach the sepals to the top of the strawberries using hot melt adhesive.Step 5: Secure the wire within the sepals and strawberries by wrapping yarn around them.Step 6: Use hot melt adhesive to secure all the components in place, creating beautifully presented strawberries.
Strawberry Flower Stamens (make 2):
- Work in the round, ch 2, leave the four half double crochet stitches unfinished, and pull through all the loops, ch 2, then 1 ss, 1 ch, cut and close the loop tightly
Strawberry Flower Petals (make 2):
- R1: Crochet 5 sc stitches in the round. 1 ssR2: (2 ch, dc, 2 ch, 1 ss) * 5 times. cut and leave a tail, weave the tail with darn needle
Assemble strawberry stamens and petals:
- Step 1: Take a wire and create a loop.Step 2: Position the loop at the center of the flower.Step 3: Place the stamen on top of the loop.Step 4: Use hot melt adhesive to secure the stamen in place.Step 5: Carefully pull the wire from within the flower to firmly attach the stamen at the center.Step 6: Cover the wire with yarn.Step 7: Use hot melt adhesive to secure the wire in place.
Big Leaf (make 3):
- R1: Crochet 6 sc stitches in the round, 1 ss R2: Ch 2, add wire,• In the first stitch, crochet (dc, 1 ch picot st).• In the second stitch, crochet (tr, 1 ch picot st) 3 times.• In the third stitch, crochet (dtr, 1 ch picot st) 2 times.• In the fourth stitch, crochet (dtr, 1 ch picot st) 2 times.• In the fifth stitch, crochet (tr, 1 ch picot st) 3 times.• In the sixth stitch, crochet (dc, 2 ch), ss, and cut the yarn, leaving a tail.Note: Carefully attach the flower rod while you are stitching to make a big leaf, the flower rod will make the big leaf firm.
Small Leaf (make 3):
- R1: Crochet 6 sc stitches in the round. R2: Chain 2, add wire• In the first stitch, crochet (dc, 1 ch picot st).• In the second stitch, crochet (tr, 1 ch picot st) 3 times.• In the third stitch, crochet (tr, 1 ch picot st) 2 times.• In the fourth stitch, crochet (tr, 1 ch picot st) 2 times.• In the fifth stitch, crochet (tr, 1 ch picot st) 3 times.• In the sixth stitch, crochet (dc, 2 ch), ss, and cut the yarn, leaving a tail.Note: Carefully attach the flower rod while you are stitching to make a small leaf, the flower rod will make the small leaf firm.
Assemble the big and small leaves:
- Step 1: Crochet three big leaves and attach the flower rod while stitching for sturdiness.Step 2: Leave a tail, cover the rod with yarn, and secure it using hot melt adhesive.Step 3: Attach the three big leaves to the strawberry.
- Similarly:Step 1: Crochet three small leaves using the provided pattern.Step 2: Attach the flower rod to make them firm while stitching.Step 3: Leave a tail, cover the rod with yarn, and secure it with hot melt adhesive.Step 4: Attach the three small leaves to the strawberry.
Final Assemble:
- Step 1: Wrap the three small leaves together with yarn, and secure it with hot melt adhesive
- Step 2: Wrap a big leaf around the top of the stem with yarn, Wrap around to about 5cm and add the other two big leaves
- Step 3: Continue wrapping, adding strawberry flowers and strawberry fruit in turn. Three strawberries all facing one side
- Step 4: Finally, add the three small leaves, wrap to the end, cut the tail and secure it with hot melt adhesive. Adjust the branches to give them a more refined look
Video
Notes
- This pattern is written in US crochet terms.
- The strawberry fruit is worked in rounds, starting with a magic ring and continuing in a spiral.
- Use a stitch marker to mark the beginning of each round.
- Stuff the strawberry fruit with fiberfill as indicated in the pattern.
- The strawberry sepals are worked in rounds and repeated multiple times to create the desired effect.
- The strawberry flower stamen is worked in the round, using chains and half double crochet stitches.
- The strawberry flower petal is worked in rounds and includes chains, double crochet stitches, and slip stitches.
- The big and small leaves are both worked in rounds, creating picot stitches for added detail.
- Fasten off and leave a tail for sewing or attaching the various components of the strawberry.
- Additional notes are written in Italics.
Afterthoughts and Wrap Up
In conclusion, this article has taken you on a delightful crocheting adventure, guiding you through the process of creating charming and realistic strawberries. We explored the intricate details and color variations that add depth and personalization to the project. It is a beginner-friendly crocheted strawberry with special stitches, adding a whimsical touch to gifts, decorations, or flower bouquets. So grab your yarn and hook, embrace the challenge, and let your creativity soar as you crochet your sweet and juicy strawberries!
More Crochet Patterns
Check out our following flower patterns too.
- Crochet African Daisy
- Forget Me Not – Free pattern with video
- 17 Crochet Leaf Patterns – Beautiful Crochet Leaves
What’s Next?
Pin this post: Save this tutorial to your Pinterest boards so that you can come back to it later.
Leave a comment: We love to hear your feedback. Tell me in the comments below!
Share on Instagram or Facebook or Youtube: When you make this project, share it on social media and tag me @hookokcrochet. We love to see what you make!


Wonderful and easy to follow pattern! I do have one question since it wasn’t mentioned anywhere, would it be okay for me to sell projects I make using this pattern? Of course you would be credited as the pattern creator!
Yes,This is allowed
Hi Love all the free pattens, and the videos if I get stuck..Has taught me so much. Thank You.