
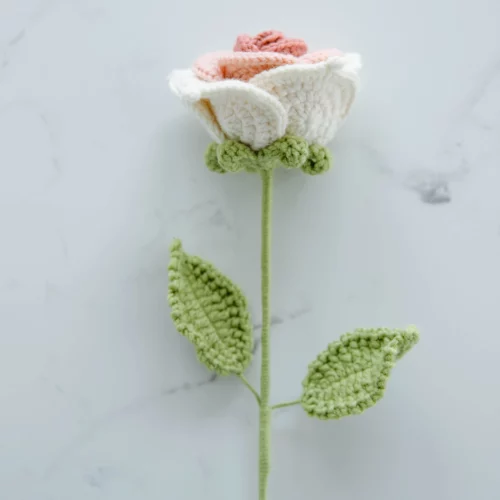
Let’s make the flower of love. This crochet rose pattern shows how to make a realistic rose with exquisite detailing. You get a step by step details on how to crochet the flower’s core and delicate petals and arrange them into a beautiful design.
The finished rose stem makes a thoughtful homemade gift, a rose arrangement, a brooch, or an embellishment to other projects. Ready to crochet roses? Grab your yarn and hook, and let’s make something amazing.
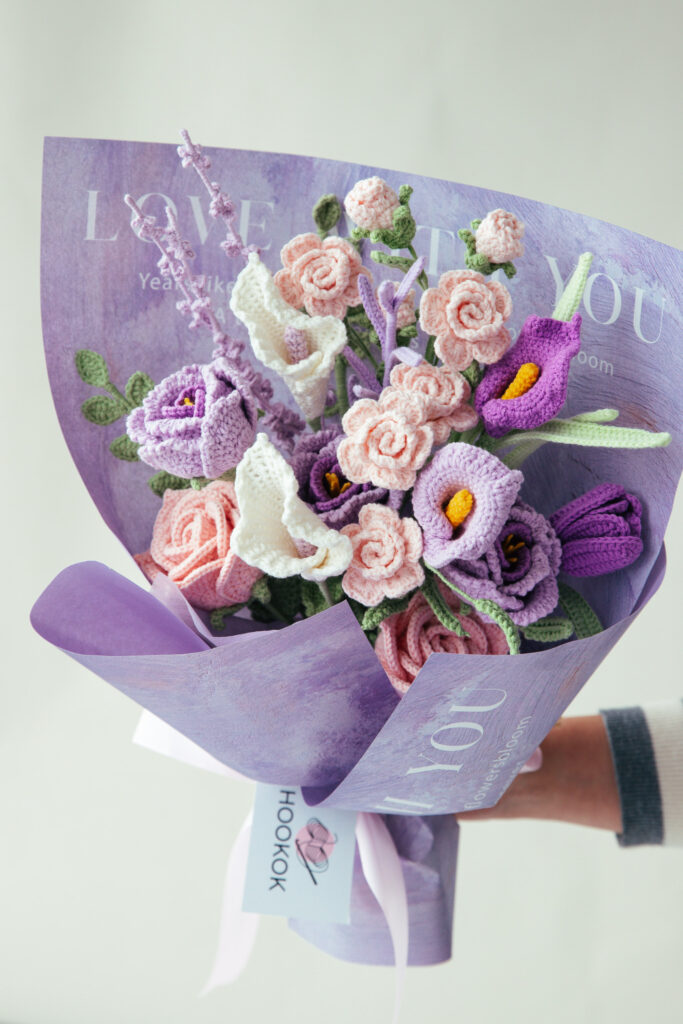
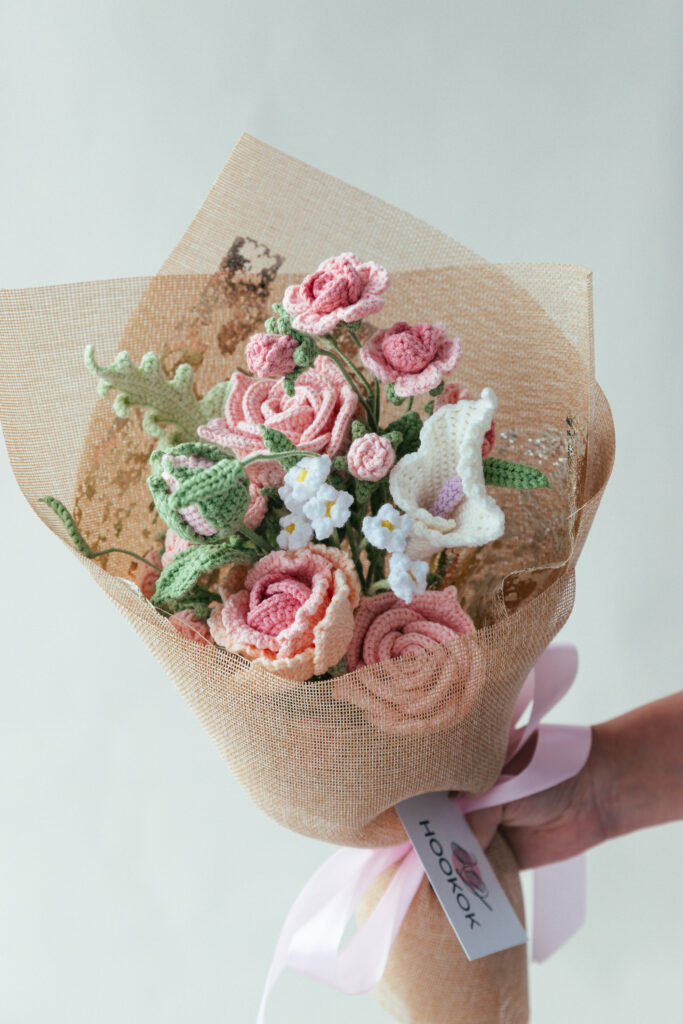
Also, Thai rose is commonly used to match bouquets. If you want to make your own crochet flower bouquet, we offer many free patterns. Check patterns list link here.

Why We Love Thai Rose
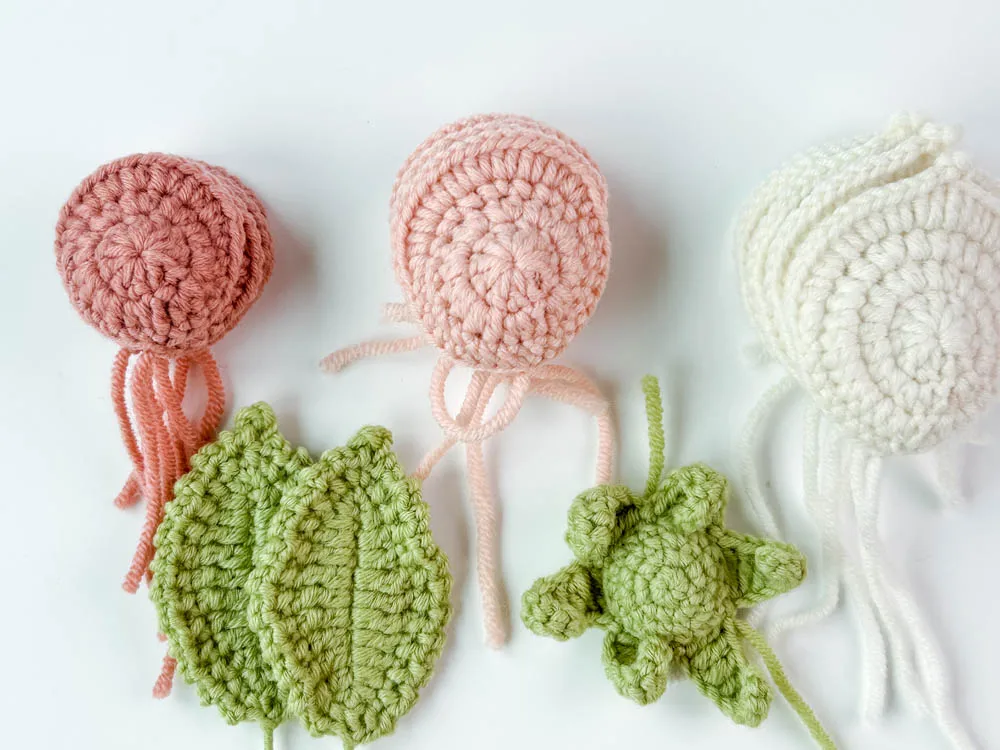
- The crochet rose comprises four small and medium petals, five large petals, a sepal, and two leaves that look realistic once assembled, showing every element of the flower. This is a great way to improve your skills and learn new techniques.
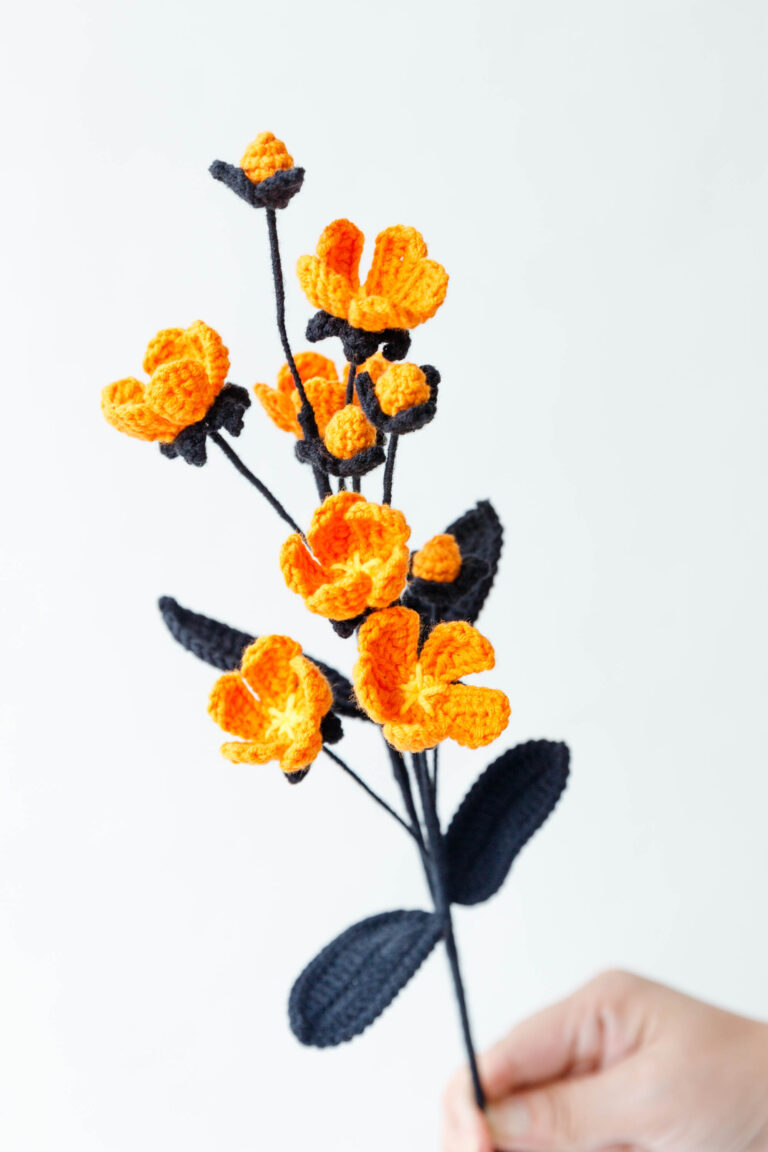
- You can choose any color for the rose depending on your liking and preference. Use deep crimson, vivid cherry red, or gentle rose pink to bring out the elegance of the flower. Vibrant clashing hues like yellow, purple, orange, and blue will result in a vivid, entertaining design that can be a conversation starter. Ombre or gradient color patterns bring sophisticated grandeur to soft, dreamy pastels.
Usage
- Original Uses: Roses are great as table center decor or gifts for birthdays, anniversaries, weddings, and baby showers.
- Functional Usage: These crochet roses make easy attachments to other items, allowing you to personalize and enhance your creations.
- Ideas for Flower Bouquets: Crochet flowers can be the main attraction for a bouquet and as delicate accents among other flowers. For a cohesive and visually appealing bouquet, consider pairing crochet roses with other flowers like daisies and sunflowers or incorporating crochet leaves for a unique touch.
Materials
- Yarn – yarn of four colors – cream, light pink, dark pink, green
- Hook – 2.5 mm
- Flower Rod – 16 inches long x 0.08 inches diameter (40cm x 2mm)
- Iron wire – 0.4mm or 0.5mm diameter
- Stitch marker
- Darning needle
- Pair of scissors
- Hot melt adhesive
Difficulty
Advanced intermediate. (However, even as a beginner looking for a challenge, you can try this pattern using as it provides the step-by-step tutorial).
Gauge
Not applicable. Changing the hook size and yarn will change the size of the projects.
Stitches Used
- Double crochet – dc
- Half double crochet – hdc
- Single crochet – sc
- Slip stitch – ss
- Treble crochet – tr
Special Stitches
Picot st – single crochet into the next stitch, chain 3, single crochet at the base of the chain
Notes
- The pattern is in US terminology.
- The rows are worked in a round.
- Use a stitch marker at the beginning of each row.
- Additional notes are indicated in italics.
Step-by-Step Pattern for Crochet Thai Rose:
Small Petal (Make 4)
- Using the dark pink color start with a magic ring
- R1: ch3, 10 dc in the round, ss
- R2: ch2, ( 2 hdc in next st) * 10 times, ss
- R3: ch1, sc6, (2 hdc in next st) * 8 times, sc6, ss
- Cut and leave a tail.

Middle Petal (Make 4)
- Using light pink color, start with a magic ring
- R1: ch3, 10 dc in the round, ss
- R2: ch2, (2 hdc in next st) * 10 times, ss
- R3: ch1, sc2, (1sc, 2sc in next st) * 8 times, sc2, ss
- R4: ch1, sc9, (2hdc in next st) * 10 times, sc9, ss
- Cut and leave a tail.
Big Petal (Make 5)
- Using cream, start with a magic ring
- R1: ch3, 10dc in the round, ss.
- R2: ch2, (2hdc in next st) * 10 times, ss
- R3: ch2, (1hdc, 2hdc in next st) * 10 times, ss
- R4: ch1, sc8, (2hdc in next st) * 6 times; (1hdc, 1dc); (ch3 picot st); (1dc, 1hdc); (hdc2 in next st ) * 6 times, 8 sc, 1 ss, 1 ch, cut and leave a tail.
Flower Sepal
- Using green, start with a magic ring
- R1: ch1, 6sc in the round, ss
- R2: ch1, (2sc in next st) * 6 times, ss
- R3: ch1, (sc1, 2sc in next st) * 6 times, ss
- R4: ch1, 18sc, ss
- R5: (ch9, start the 2nd sts from hook ss2, 1 sc, hdc2, dc2, tr1, sk2, ss)* 6 times
- 1 ss, 1 ch, Cut and leave a tail for wrapping.
Leaf

- Using green yarn, start with foundation chain: ch12
- R1: add wire, start the 2nd sts from hook, sc, hdc, dc2, tr3, dc2, hdc, 3sc in last st; hdc, dc2, tr3, dc2, hdc,sc2 in next st, ss
- R2: (ch2, sc) * 12 times, ch 3 picot st, (ch2, sc) * 12 times, ss, cut and leave a tail. Wrap the tail around the wire.
Assembly
Note: watch the video tutorial for further details.
Assembling the Rose Petals
- Step 1: Wrap the small petals around the rod one at a time using glue at the base to seal them together
- Step 2: Take the middle petals and wrap them around the small petals one at a time, gluing them slightly over each other until you cover the sides of all the small petals.
- Step 3: Take the large petals and continue the process, ensuring the tip of the large petal rests between two middle petals. Using glue, attach to the outer part of the middle petals one at a time. Cut off the tails.
Joining the Sepal
- Step 4: Insert the rod of the assembled rose through the center of the sepal and glue the petals and sepals together, making sure the sepal tips are curved out.
Joining the Leaves
- Step 5: Using green yarn, wrap a few inches down the rod, then attach the leaves opposite each other, continue wrapping until the end, and finish by gluing the end. Arrange the leaves so they look aesthetically pleasing.
Video
Petals and Sepal Video Tutorial ①
Leaf, and Assemble Video Tutorial ②
Note: Video subtitles need to be turned on by yourself in the settings
Crochet Thai Rose
Equipment
- hook 2.5 mm
- stitch marker
- Darning needle
- scissors
Ingredients
- Yarn yarn of four colors – cream, light pink, dark pink, green
- Flower Rod 16 inches long x 0.08 inches diameter (40cm x 2mm)
- Iron wire 0.4mm or 0.5mm diameter
- Hot melt adhesive
Instructions
Small Petal (Make 4)
- Using the dark pink color start with a magic ringR1: ch3, 10 dc in the round, ssR2: ch2, ( 2 hdc in next st) * 10 times, ssR3: ch1, sc6, (2 hdc in next st) * 8 times, sc6, ssCut and leave a tail.
Middle Petal (Make 4)
- Using light pink color, start with a magic ringR1: ch3, 10 dc in the round, ssR2: ch2, (2 hdc in next st) * 10 times, ssR3: ch1, sc2, (1sc, 2sc in next st) * 8 times, sc2, ssR4: ch1, sc9, (2hdc in next st) * 10 times, sc9, ssCut and leave a tail.
Big Petal (Make 5)
- Using cream, start with a magic ringR1: ch3, 10dc in the round, ss.R2: ch2, (2hdc in next st) * 10 times, ssR3: ch2, (1hdc, 2hdc in next st) * 10 times, ssR4: ch1, sc8, (2hdc in next st) * 6 times; (1hdc, 1dc); (ch3 picot st); (1dc, 1hdc); (hdc2 in next st ) * 6 times, 8 sc, 1 ss, 1 ch, cut and leave a tail.
Flower Sepal
- Using green, start with a magic ringR1: ch1, 6sc in the round, ssR2: ch1, (2sc in next st) * 6 times, ssR3: ch1, (sc1, 2sc in next st) * 6 times, ssR4: ch1, 18sc, ssR5: (ch9, start the 2nd sts from hook ss2, 1 sc, hdc2, dc2, tr1, sk2, ss)* 6 times1 ss, 1 ch, Cut and leave a tail for wrapping.
Leaf
- Using green yarn, start with foundation chain: ch12R1: add wire, start the 2nd sts from hook, sc, hdc, dc2, tr3, dc2, hdc, 3sc in last st; hdc, dc2, tr3, dc2, hdc,sc2 in next st, ssR2: (ch2, sc) * 12 times, ch 3 picot st, (ch2, sc) * 12 times, ss, cut and leave a tail. Wrap the tail around the wire.
Assembly
- Assembling the Rose Petals
- Step 1: Wrap the small petals around the rod one at a time using glue at the base to seal them togetherStep 2: Take the middle petals and wrap them around the small petals one at a time, gluing them slightly over each other until you cover the sides of all the small petals.Step 3: Take the large petals and continue the process, ensuring the tip of the large petal rests between two middle petals. Using glue, attach to the outer part of the middle petals one at a time. Cut off the tails.
- Joining the Sepal
- Step 4: Insert the rod of the assembled rose through the center of the sepal and glue the petals and sepals together, making sure the sepal tips are curved out.
- Joining the Leaves
- Step 5: Using green yarn, wrap a few inches down the rod, then attach the leaves opposite each other, continue wrapping until the end, and finish by gluing the end. Arrange the leaves so they look aesthetically pleasing.
Video
Notes
- The pattern is in US terminology.
- The rows are worked in a round.
- Use a stitch marker at the beginning of each row.
- Additional notes are indicated in italics.
Leaf, and Assemble Video Tutorial ②
Note: Video subtitles need to be turned on by yourself in the settings
After Thoughts and Wrap Up
That’s a wrap. The crochet rose pattern is popular amongst crocheters for its beauty and large color options. You can use the classic red rose or experiment with bright and unusual colors to make a statement that fits your style and purpose.
So bust your stash, get creative, and make a crochet rose.
More Crochet Patterns
Check out our following flower patterns too.
Crochet Tulip- Stuffed Tulip
Crochet Forget Me Not Flower
17 Crochet Leaf Patterns – Beautiful Crochet Leaves
What’s Next?
Pin this post: Save this tutorial to your Pinterest boards so that you can come back to it later.
Leave a comment: We love to hear your feedback. Tell me in the comments below!
Share on Instagram or Facebook or Youtube: When you make this project, share it on social media and tag me @hookokcrochet. We love to see what you make!


Beautiful pattern. I’m making a bouquet for my mum and I bet she will love them. Super easy assembly too!
Thank you Liliana. Happy crocheting.
R3: ch1, sc6, (2hdc in each st) * 8 times, sc6, ss
Can you please explain this row
R3: ch1, sc6, (2hdc in one st)*8 times, sc6, 1ss in the first st of the row.
Overall a great pattern with a beautiful end product! HOWEVER, there is a mistake in the sepal instructions and it is inconsistent with the rest of the pattern’s formatting. I have corrected and re written it bellow. Hope that helps the next super confused crocheter!
Using green, start with a magic ring
R1: ch1, 6sc in the round, ss
R2: ch1, (2sc in each st) * 6 times, ss
R3: ch1, (1 sc, 2sc in each st) * 9 times, ss
R4: ch1, 18sc, ss
R5: [ch9, from 2nd sts from hook (ss) * 2, sc, (hdc) * 2, (dc) * 2, tr, (sk) * 2, ss] * 5 times
1 ss, 1 ch, Cut and leave a tail for wrapping.
Thanks for your reminder. We have corrected the pattern.
thank you, you’re a lifesaver!! don’t you mean “ R3: ch1, (1 sc, 2sc in each st) * 6 times, ss”, though?
R3: ch1, (1sc, 2sc in next st)*6 times, 1 ss.
The sepal directions are a tad off. Instead of bringing the total count to 18 stitches, it brings it to 24 in R3 of the top directions and even more in the printable version. What is the proper method to come out with 6 “spikes” at the end?
what weight of yarn do you use for this? I do not see a recommendation anywhere. Thank you for your help.
4Ply,deer
Very nice and wrote and also showed in ditels.Thank you so much .
For the big petals, I don’t understand row 4. My row 3 gave me 40sts at the end and when doing the 4th, I have a lot of stitches that are left undone at the end.
All are nice and clearly explained. Thank you so much
Amazing result, clear instructions. thank you so much!
Absolutely beautiful rose pattern, so are the colors, wish. I can send you a picture! Thanks very much and warm hugs from 🇵🇪 Peru!
Hi
Lovely flowers I make this flower I am very kind for your pdf of this flower
Thank you for your free patterns they are lovely
The patterns are all love based n the pictures, however the photos seem to be missing from all the patterns.
The patterns are truly beautiful❤️ But the glueing… It was a shock to me. Whyyy?
Amazing
Very nice
It is a beautiful flower and I am making a bouquet for my boyfriend, for valentines day. But the Big petal is a bit off. Row 3 ends with 30 stitches total (3×10) but row 4 requires 32 (8+6+4+6+8). Just left 2 sc out.